
Episode 9: Content Production
TL;DR
- Everything lives under Content; keep your workspace folders simple and intuitive.
- Build an email three ways: create with HTML, use components, or select a template.
- With HTML, add the unsubscribe and Organization Physical Address merge fields, or saving will result in an error in a flow.
- Test sends need a segment and use up message credits.
- Approve before publishing, and build templates for recurring sends.
Welcome back to our Marketing Cloud Next (MCN) migration guide. This episode covers how to create an email in the platform, including workspace setup, building an email and a template, testing and approval, and the folder structure we use.
Workspaces and Folders
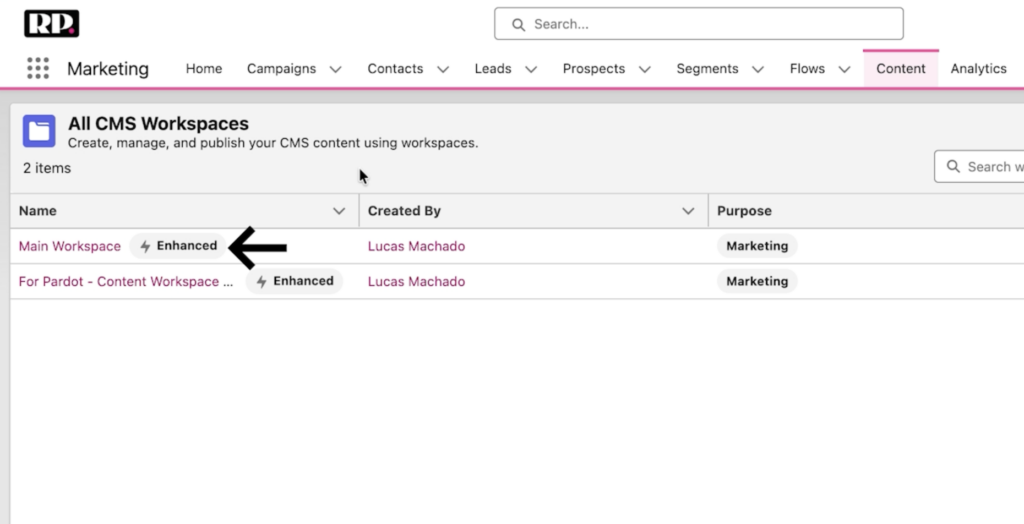
When you log into Marketing Cloud Next, go to Content to see all of your content management workspaces. We have two: one for pages migrated over from Pardot, and our main workspace, which is where we’ll work today.
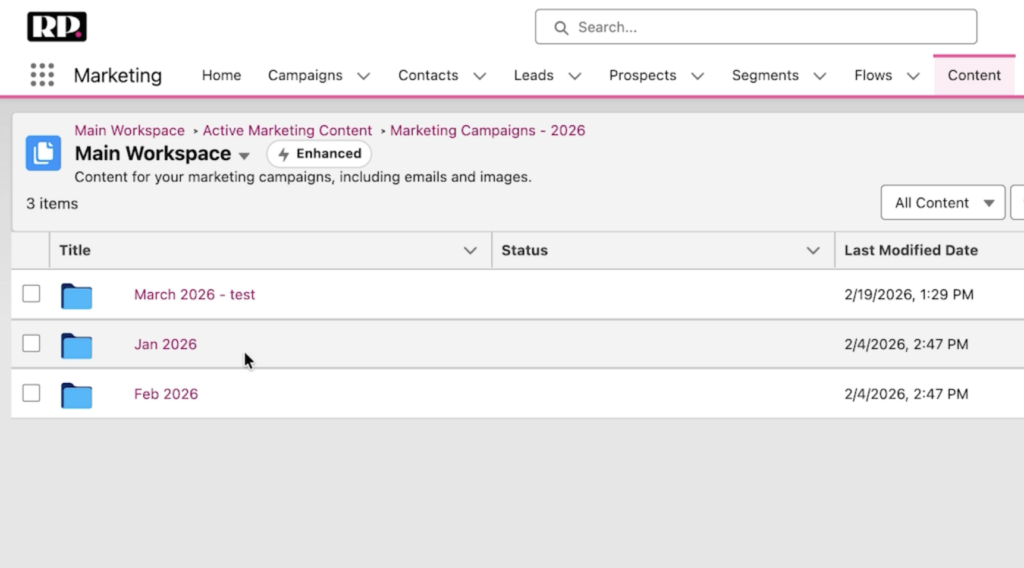
Inside the main workspace, we use a simple folder structure: active marketing content, brands, templates, testing, and archive. The brands folder is where you’d set up multiple brands if you have them (we only have one, Revenue Pulse), which lets people pick a brand to follow when they create an email.
Inside active marketing content, we keep campaigns organized by year, then by month and year (Jan 2026, Feb 2026, and so on), with a folder per event or campaign inside each month. We also keep a random folder for anything not tied to a campaign. For this walkthrough, we’re working in a March 2026 test folder.
Creating an Email with HTML
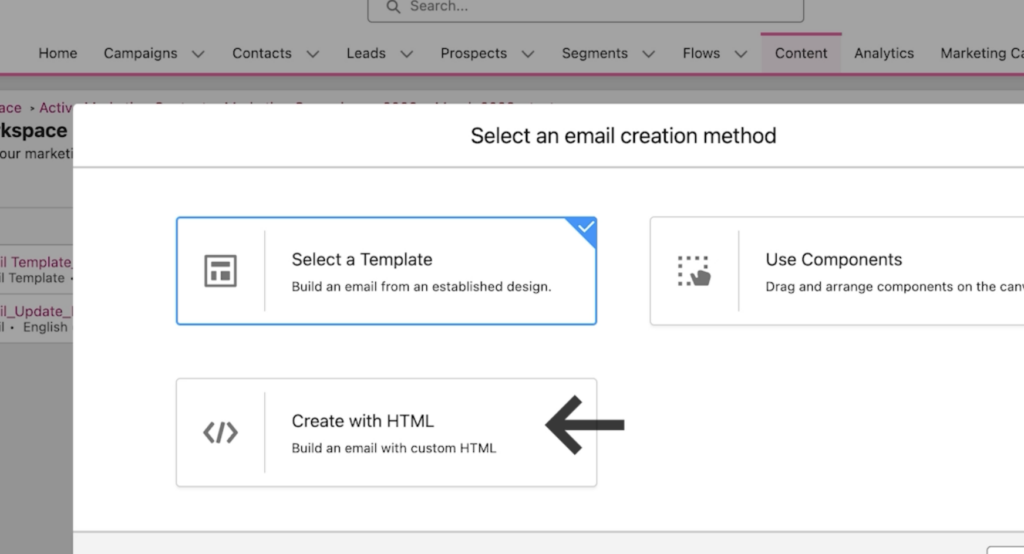
From your folder, click Add in the top right, then Content, select email, and click Create. You get three options: create a template, create with HTML, or use components. We’ll start with the create with HTML option.
On the right is a white block for your source code. Up top are your subject line, preheader, and settings.
- Rename the email with the pencil icon.
- Go to Settings > Subject line to set your subject line, then do the same for your preheader. Both appear in the top left.
- Add merge fields (tokens) as needed.
- Set the email as promotional or transactional.
The Select a brand step isn’t needed with HTML. It matters with components, which default to Salesforce branding until you apply a brand.
Bringing in your HTML: We use Knak, so we download the email as HTML, open it in a text editor, then copy and paste the code into the white block. The preview appears on the left.
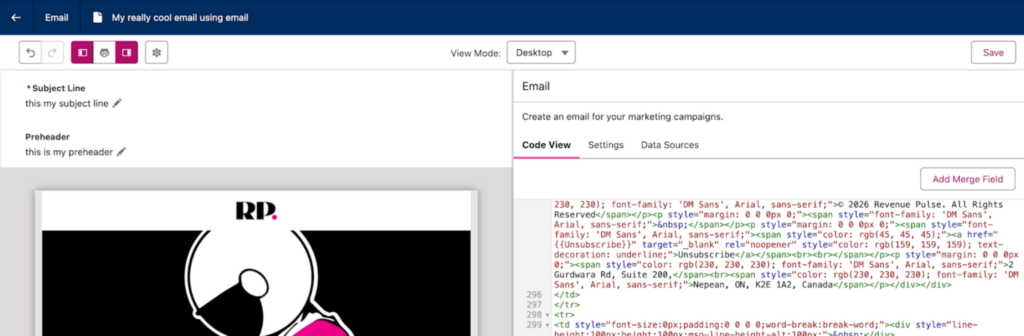
Required tags: If the email will be used in a flow, you must add the unsubscribe merge field and a merge tag for Address 2 (the footer’s physical address). Skip them and saving throws an error. To fix it, replace the unsubscribe placeholder with an Unsubscribe merge field, and replace the footer placeholder with the Organization Physical Address tag. Then save.
Testing and Approval
Click Preview to send the email for review. You need a segment to test with, so we use a special internal test segment, select ourselves as the recipient, enter our email address, and choose our marketing email as sender.
Note: test sends count toward your message credits, so you can burn through them quickly if you’re not watching.
The test arrives with [TEST] in the subject line. Click every link, especially the unsubscribe link. Once it looks good, approve it.
Publishing
Click Publish, then Next. You can publish right away or schedule it. We approve first, then publish, because using a published email in a flow otherwise means unpublishing and republishing for every edit. Approving up front saves time later.
Creating an Email Template
For recurring sends like newsletters or event invites, build a template. Best practice is to keep them all in your Templates folder: click Add > Content, select email template, and click Create.
In the editor, drag and drop components from the left (heading, paragraph, list, custom HTML), use layout options (content blocks, repeaters, sections), and add media for images. Components default to Salesforce branding, so edit them to match your brand. Selecting your brand updates colors and button styling automatically.
The component tree on the side shows a tree view of your email’s structure. When the template is ready, publish it the same way you publish an email.

Using a Template
On a tight deadline, build the email straight from your template. Go to Add > Content > email > Create, then choose Select a template. Pick your template, drop in your copy, save, and publish.
And that’s how you create an email and a reusable template in Marketing Cloud Next!
We’ll see you in the next episode, where we’ll cover everything you need to know about audiences and campaigns.
If you need extra help or have any questions about your MCN migration, send us a message.