
Episode 11: Forms & Flows
TL;DR
- A form collects your data, but it does nothing until you connect it to a flow.
- In MCN, a form submission creates a form submission object, not a lead or contact.
- The flow is what turns that submission into a real lead or contact.
- Order matters: build the form first, then build the flow.
We’ve come a long way! In the previous episode, we covered campaign setups and emails, along with some really cool AI initiatives.
Now we need somewhere to collect data from the people who are interested in coming to our event, and forms are the place to do that.
Keep in mind that there is a specific order to setting this up, and skipping ahead will cause problems. We learned this the hard way. While trying to get a campaign working, we attempted the setup over 10 times and ended up with a bunch of DNU campaigns before we figured out the right sequence.
Follow the order below to save yourself the frustration.
Step 1: Create Your Form
Start in the folder of your event. Add content, then create your form. This opens the form editor.
You can do quite a bit of building in the form editor. If you want to personalize things, you can add a data source, though we’re not going to do that right now. You can also select your brand here. When we say brand setup, we mean your colors and other brand details saved in MCN. If you have a brand set up, selecting it will auto-populate everything you have there.
Next, add a form title. For this example, we’ll call it “Cool AI Event Form.”
Then you can start bringing in components:
- Add an Email component and ask for the email address.
- Add a plain text component for first name.
- Add another for last name.
- Add one for company. We often need company to save our records inside Salesforce.
From here, you can style the form however you like. You can make all the fields required. We also want a checkbox so people can confirm their opt-in to communications.
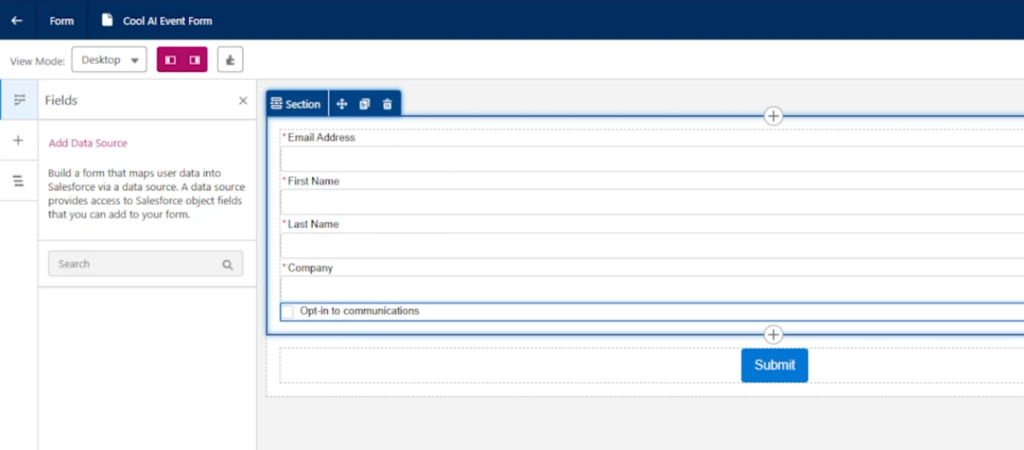
To style the form, you can work on the full column. Change the color scheme to whatever you prefer and add your hex colors.
Once you’re happy with the styling, hit save.
Why You Can’t Publish Yet
Your form is now saved, but you can’t publish it because it doesn’t have a flow.
Here’s the key thing to keep in mind: whenever someone submits a form in MCN, it does not create a lead or a contact. It creates a form submission object. You have to set up a flow to transform that submission into a real lead or contact.
So now that your form is finished, stop here and go create a new flow for your campaign.
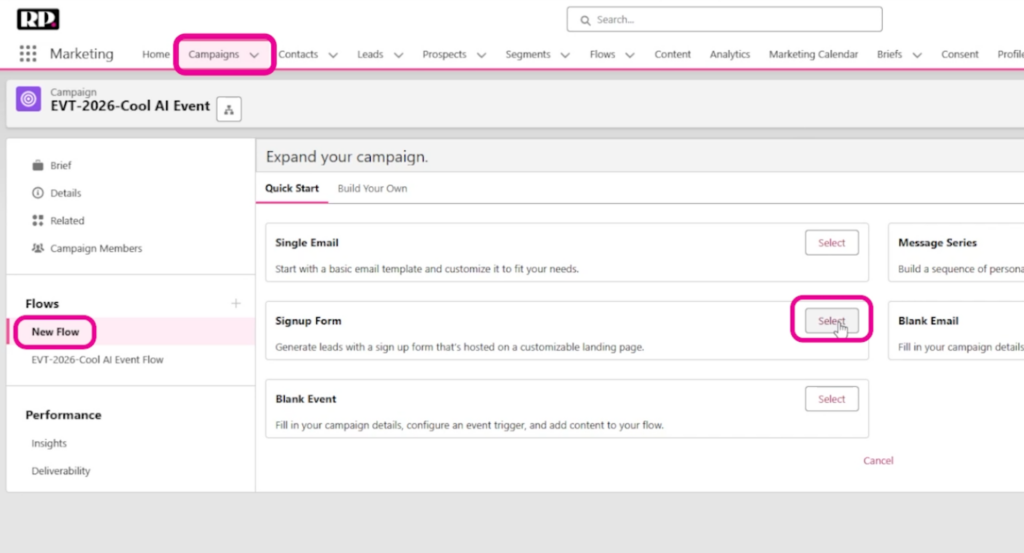
Step 2: Build the Flow
When you create your flow, you can pick a form. By default, this flow goes to lead creation, create content, and so on. Since MCN already transforms contacts and leads into individuals through the data cloud, the default can work as is.
That said, we recommend a flow that first checks whether someone already exists as a contact. Here’s the logic we’d set up:
- Start with an If on the email address. Get the record first by searching for the contact whose email equals the email submitted in the form.
- Save the result as a variable for the contact ID. The data type is text, it starts empty, and you only want the first one. Store all fields.
- Now check whether the contact ID exists (was set to true).
- If it exists, update that record.
- If not, create a lead.
- Then check whether you have consent. If the opt-in object was set to true (the opt-in communication equals true), create the consent.
- If you don’t have consent, go through the default outcome.
If you have an email going out, add it at the end, right after creating the consent.
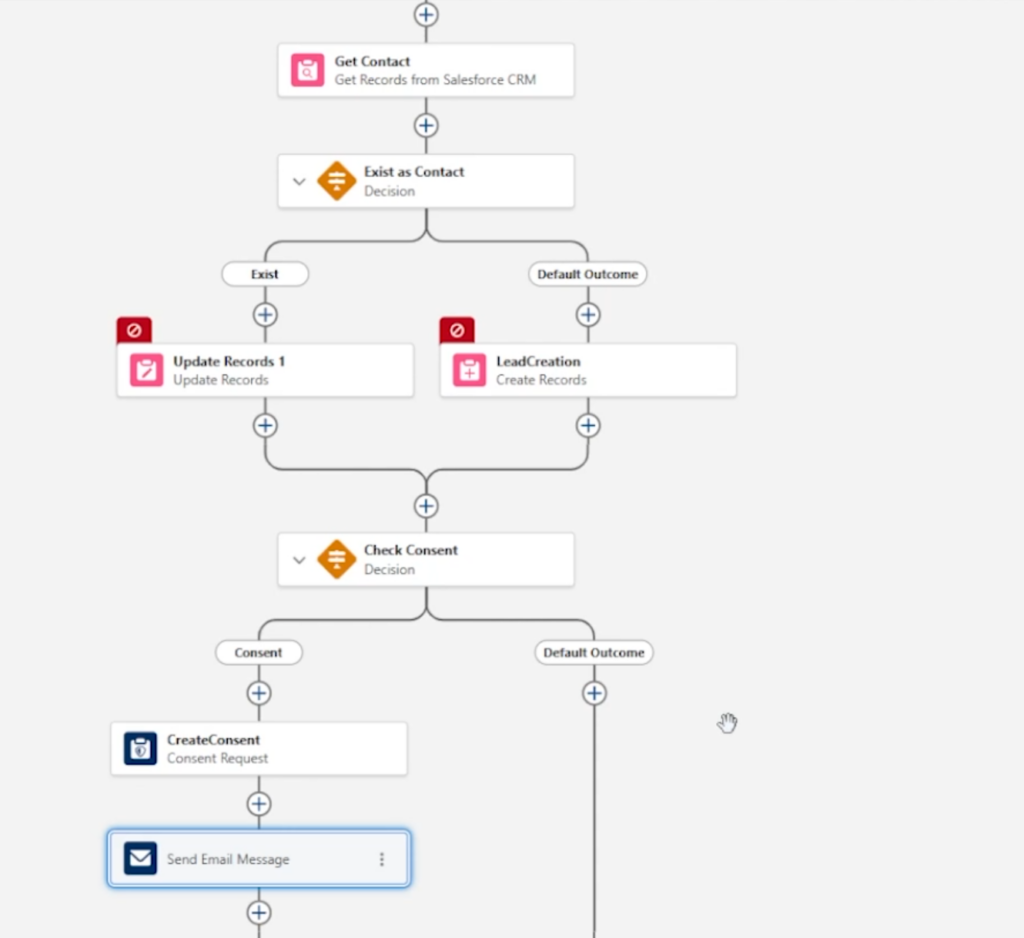
Note: The creation of this flow can get complicated fast, with several steps and fields to edit. For this part, we highly recommend following along with the video version of this guide above. The flow creation starts at 4:32.
Creating the form is not the only thing you need. You also need this flow connected to the form to make it work, and it has to follow a specific logic and a specific order.
Get that order right, and your landing page, form, and campaign will all work together as they should!
Congratulations on making it this far!
With your form and flow connected, you’ve done most of the heavy lifting.
In our next episode, the final one in this guide, we’ll step back and walk through some best practices to help everything you’ve built run smoothly.
As always, don’t hesitate to reach out here if you have any questions about your MCN migration.