This website uses cookies to improve your experience. We'll assume you're ok with this, but you can opt-out if you wish. Read More

TL;DR
Welcome back to RP’s MCN Migration Guide! In this episode, we’re covering identity resolution, which is one of the most important configurations you’ll set up in your Marketing Cloud Next instance.
Let’s get straight into it.
Why Identity Resolution Matters
Marketing Cloud Next uses one object called an individual. These individuals come from your contacts, your leads, your prospects, and other objects from the CRM across multiple sources. The question is: How do you know if you’re talking to the same person more than once?
For example, when a lead auto-converts to a contact, that person can end up existing as both a lead and a contact in the system. They’re the same person, but now they may have duplicate entries.
This is where identity resolution comes in. You need something that will transform your individuals into unified individuals. And you have the same thing for accounts. It’s a set of rules that will deduplicate your accounts and deduplicate your individuals, then consolidate those into a set of objects that you can reliably use.
Setting Up Your Match Rules
You can set up your identity resolution rules in a few different ways. You can build them out manually, or you can go to your basic settings in Marketing Cloud and generate the default rule set. The default rule set is the one recommended by Salesforce when initially setting up your unified individuals and unified accounts. Let’s walk through the rules for each.
Unified Account Rules
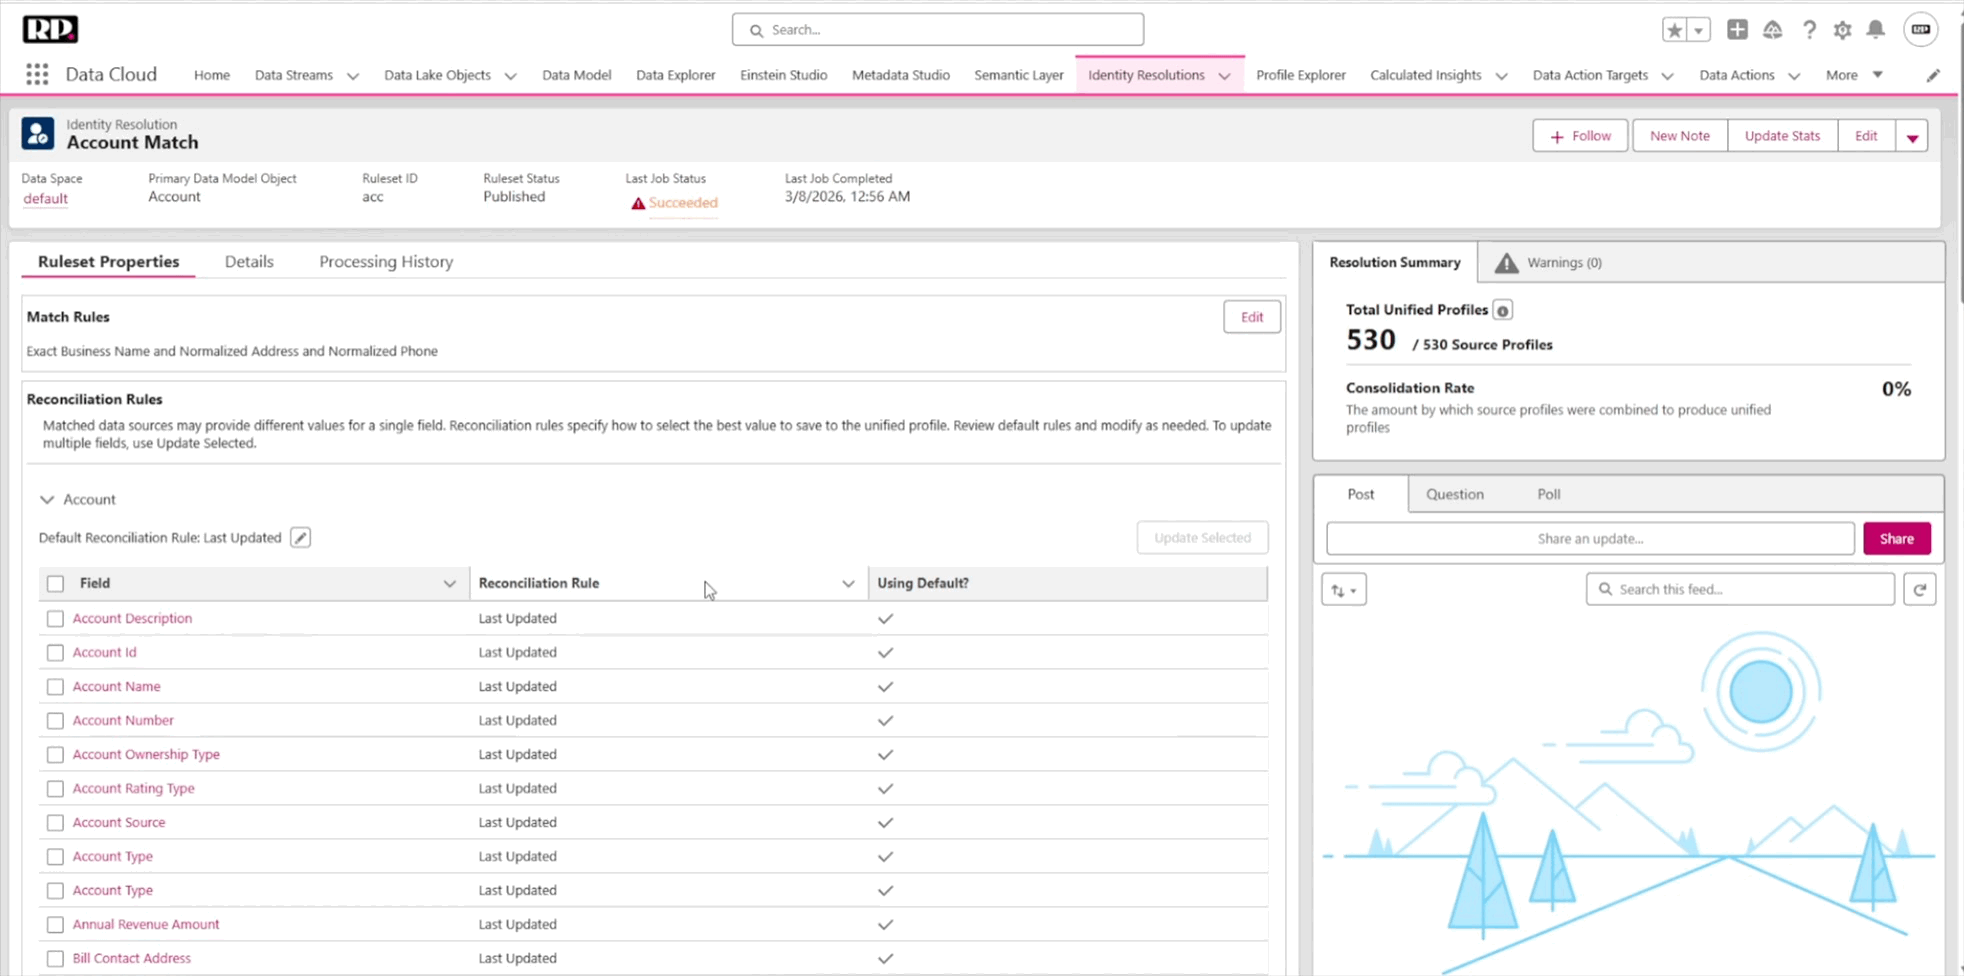
The default rules for unified accounts use three “match” criteria: exact business name, normalized address, and normalized phone. If two accounts have the same name, the same normalized address, and the same normalized phone, they will be merged into the same unified account.
You also have reconciliation rules for every specific field.
For example, the account description will use the value that was last updated. Most default reconciliation rules follow this same “last updated” pattern, but you can set specific ones for specific fields. This also extends to contact point address, contact point email, and contact point phone, all of which you can configure with different reconciliation rules to decide which field to pick from which object.
To add a custom match rule:
As another example, you could create a rule called “Domain Match” where you match accounts based on their website field using fuzzy high-precision matching.
You have the flexibility to build whatever matching logic makes sense for your organization.
(Adding a custom match rule in the Identity Resolution UI)
Unified Individual Rules
The default individual “match” rules include: normalized email, lead-to-contact, and device-to-known.
Normalized email compares email addresses. When they are the same after normalization, it reconciles them into one unified individual.
Lead-to-contact is an advanced matching type that looks for leads that were converted to contacts. This is a default category built into Salesforce specifically for this purpose.
Device-to-known handles people who were navigating your website and being captured as anonymous visitors. When they fill out a form and become known, this rule matches them to an individual using an advanced device-to-known setting that is recommended by Salesforce.
If you want additional match criteria beyond these defaults, you can add them here too. For example, you could add a first and last name match rule as another consolidation rule. It’s entirely up to you.

(Individual match default rules in the Identity Resolution UI)
Before You Move On
There are a couple of important things to keep in mind once your rules are set up.
Identity resolution runs every single day. You can see this in the processing history. And every time it runs, it consumes credits. Because of this, we recommend you have just one rule for account matching and one rule for individual matching active. You don’t need more than that, because those are what you’ll be working with.
Once you’ve created your unified individual and unified account, you need to go to your basic settings and select them in the dropdown. This tells Marketing Cloud Next to work with those objects. If you haven’t set up your rules yet, you can also click “Generate Rule Set” here to create the defaults. That said, understanding how these rules work under the hood will make it much easier to set up your account and create custom rules down the line.
What’s Coming Next
In the coming episodes, we’re going to dive much deeper into Marketing Cloud itself, showcasing all the things you can actually do within the platform. Stay tuned!
P.S. If you are feeling confused or overwhelmed when navigating through any of the steps in this article, feel free to reference the video above for an in-depth walkthrough.
This website uses cookies to improve your experience. We'll assume you're ok with this, but you can opt-out if you wish. Read More