This website uses cookies to improve your experience. We'll assume you're ok with this, but you can opt-out if you wish. Read More

TL;DR
Welcome to Episode 3 of RP’s MCN Migration Guide. In this episode, we walk through the full process of enabling Marketing Cloud Next, provisioning user access, and getting your team into the platform.
We also share a real story from our own migration about what happens when you commit to sending an email before your instance is truly ready. Spoiler: it involves a mild panic attack.
The goal here is simple. You should be able to come into this episode without MCN enabled and leave with your instance up, your first users inside, and a clear understanding of the access layers you need to configure.
Let’s jump in!
Enabling Marketing Cloud Next
To get started, navigate to Setup > Marketing Cloud Assisted Setup > Basic Settings. You’ll see a checklist of tasks that need to be completed. The good news is that Salesforce will have already done most of them for you.
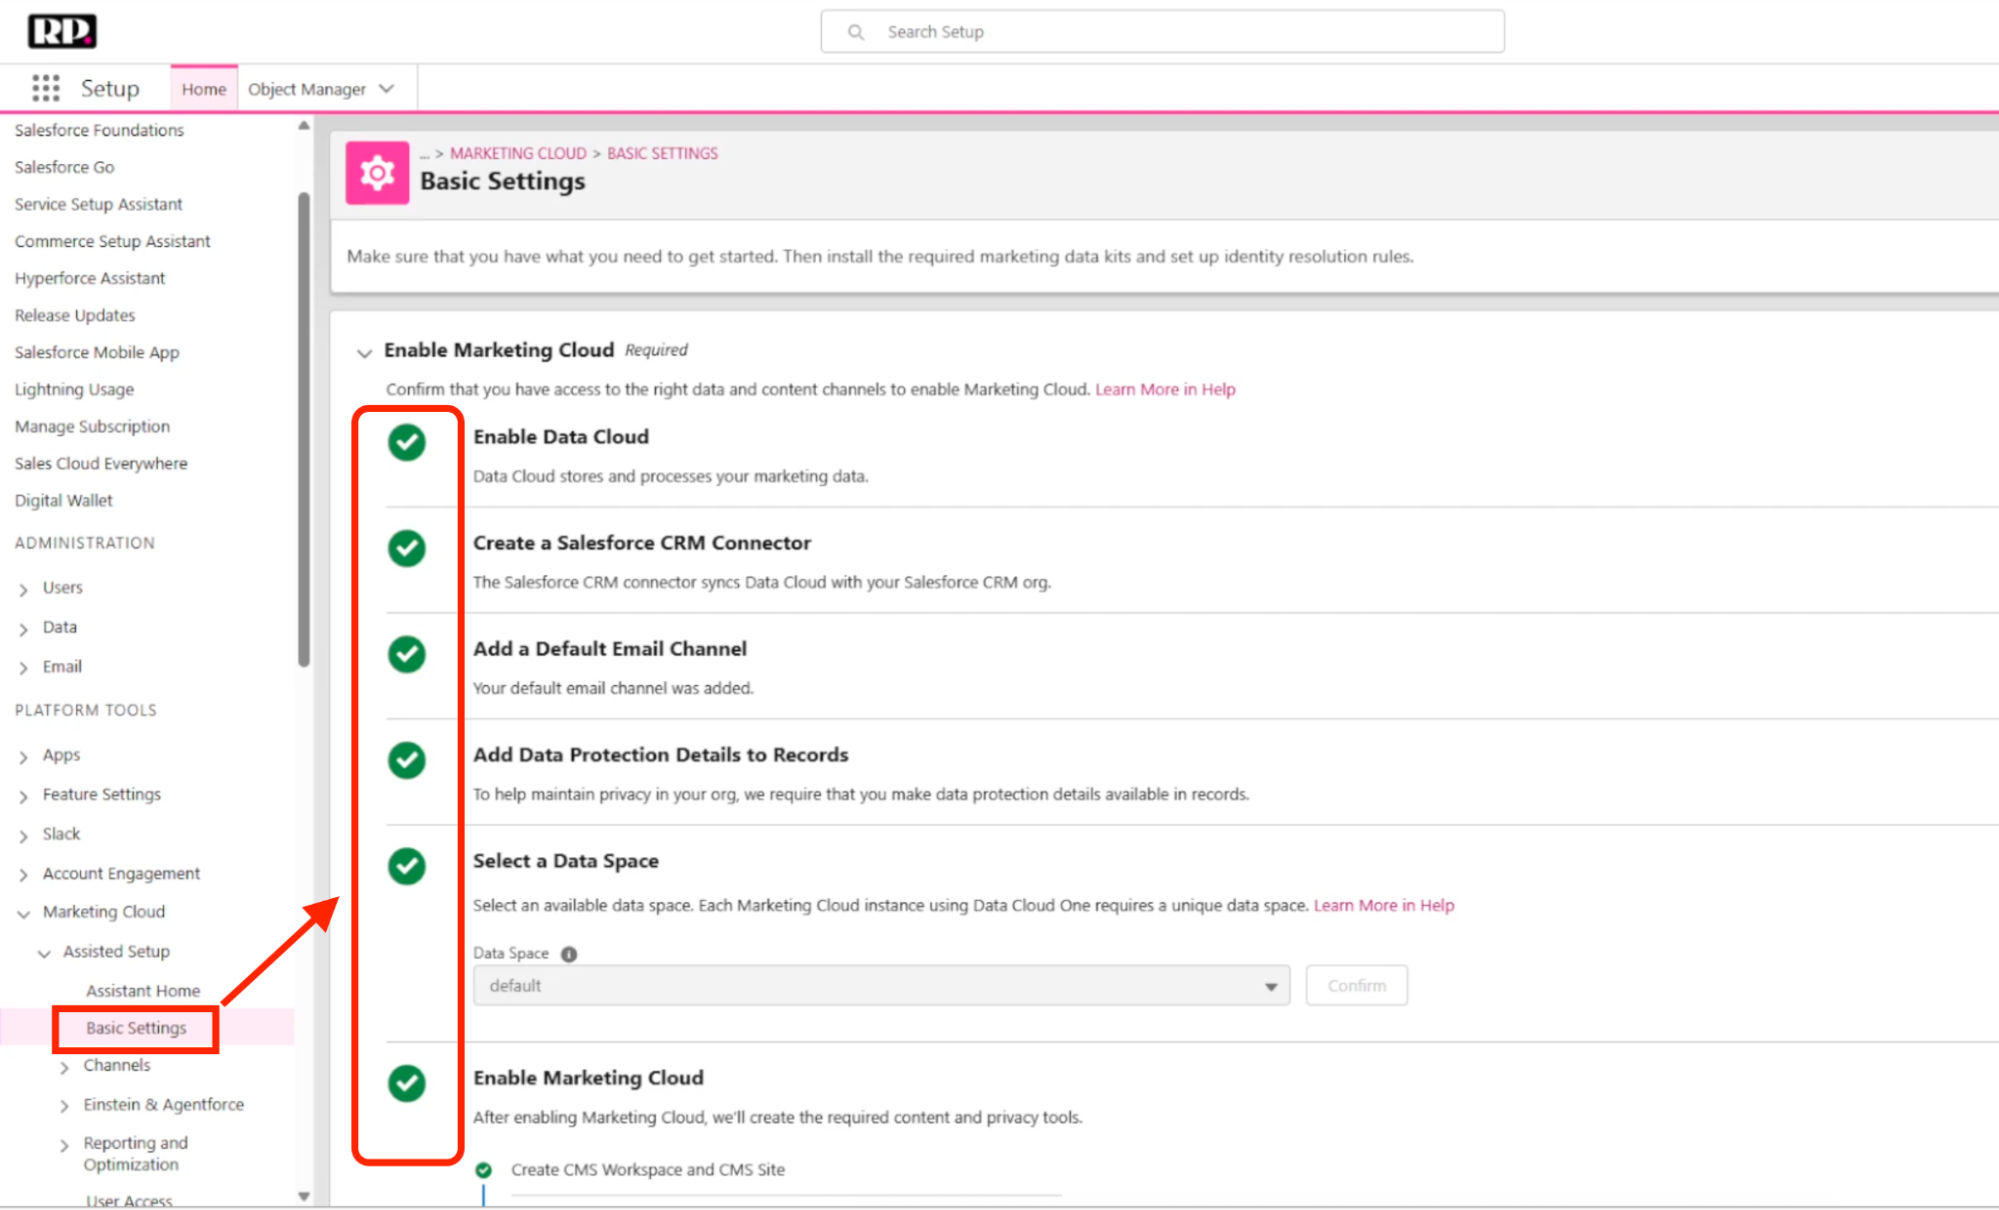
[Screenshot: The Marketing Cloud Assisted Setup checklist in Basic Settings]
[Screenshot: The Marketing Cloud Assisted Setup checklist in Basic Settings]
Here’s what each item involves:
Enable Data Cloud. This is typically already done. If it’s not, it’s a straightforward toggle.
Create a Salesforce CRM Connector. Sometimes this is already done. To check:
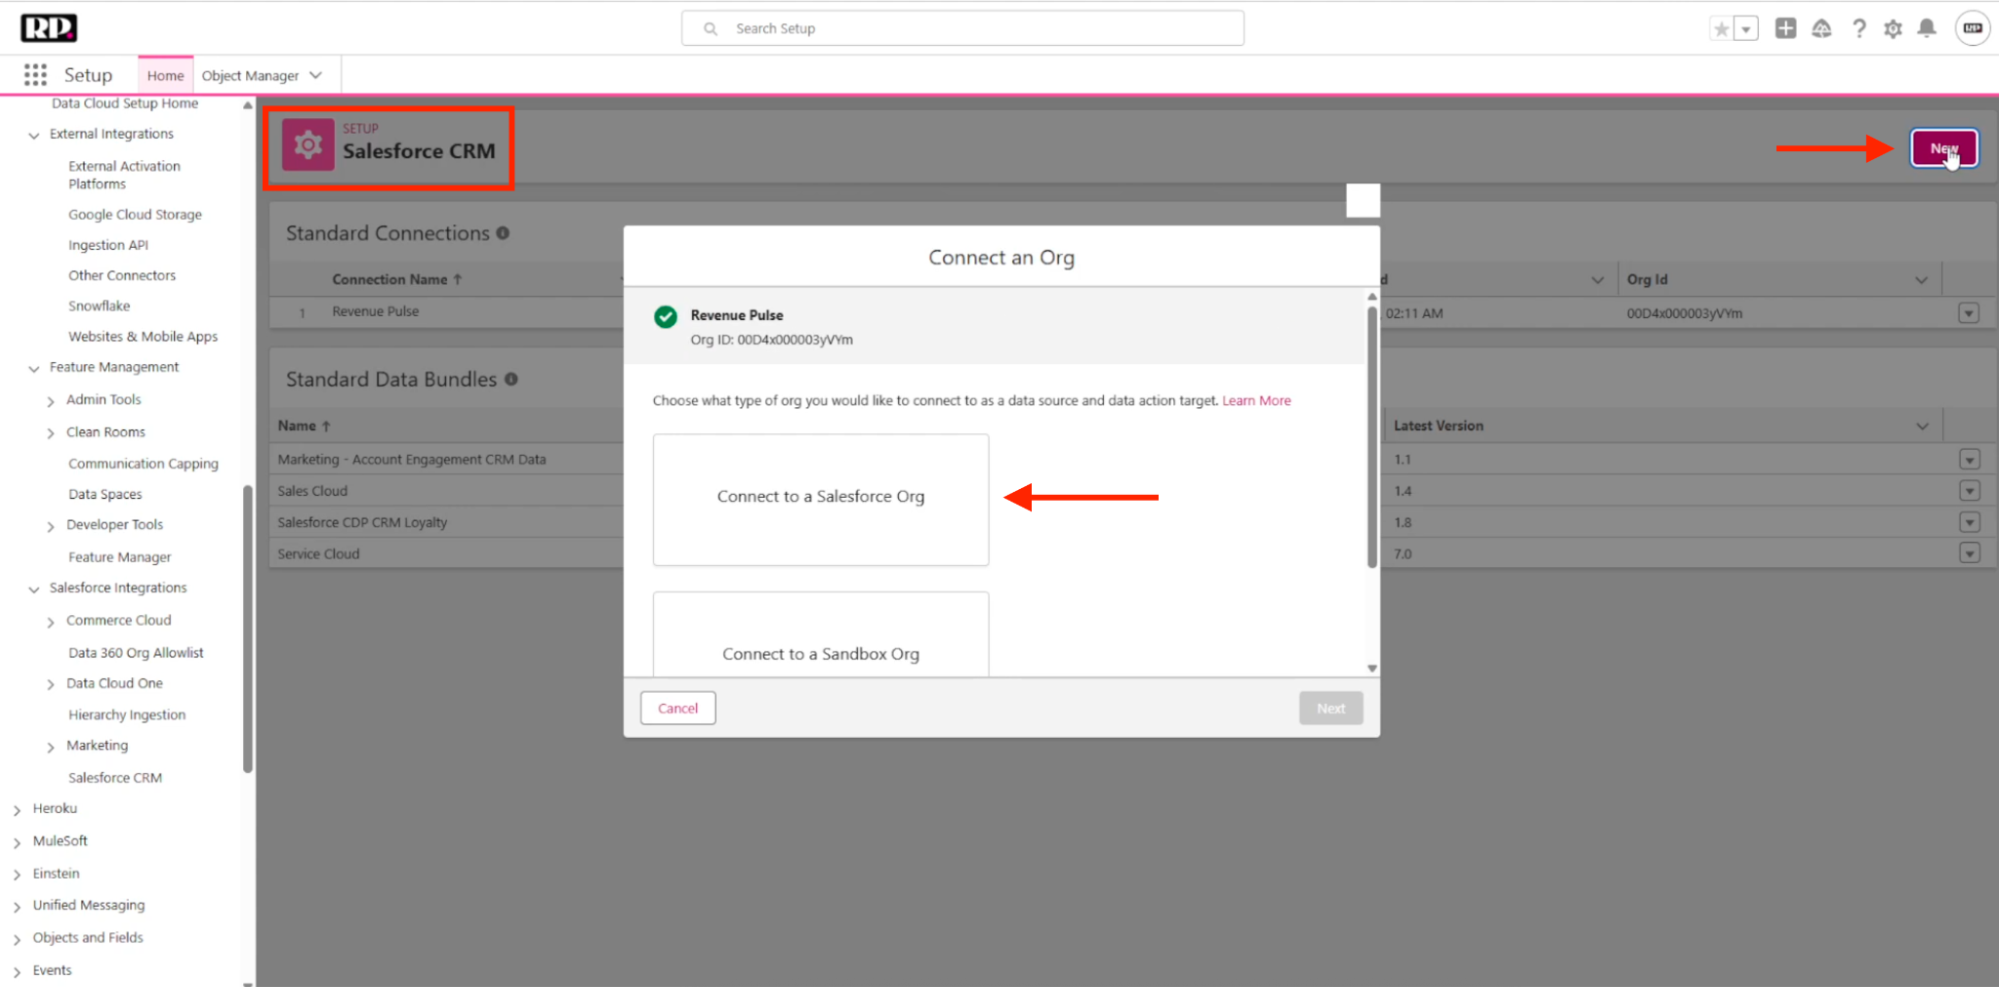
[Screenshot: The Salesforce CRM connector page showing existing connections]
Add your default email channel. This should come by default with no further action needed.
Add data protection details to records. Also should come by default. If it didn’t, go to Data Protection and Privacy, click Edit, and check the checkbox.
Select the data space. Data Cloud can be segmented into different data spaces (for example, one for North America, one for EMEA, one for APAC). If you only have one, select the default and confirm.
Once all of that is complete, click Enable.
One Database, Shared with Your CRM
If you click Enable and it doesn’t work, try once or twice more. If it still fails, don’t keep clicking because you risk locking something in your instance. This is the time to raise a Salesforce support ticket.
In most cases, this is a provisioning issue on Salesforce’s backend. During our own migration, we had acquired MCN before all of the backend infrastructure on the Salesforce side was finished. Some parts of their system said we didn’t have access to Marketing Cloud when we actually did. Once we reached out to support, the issue was resolved.
Installing Marketing Data Kits and Identity Resolution
After enabling MCN, you’ll need to install the marketing data kits from Data Cloud. These connect your data with your marketing assets. This is pretty straightforward, just click install and wait.
You’ll also need to configure identity resolution, which is how you set up deduplication rules, match records to unified individuals, and set field-level priorities. This is a complex topic that gets its own full episode coming up!
Provisioning User Access
This is where things get a bit tricky. Because MCN has multiple layers of access that all need to be configured, missing any one of them means your team will be locked out of something.
Permission Sets
MCN comes with two default permission sets:
Marketing Cloud Manager can manage campaigns, set up communications, build flows, and handle day-to-day marketing operations.
Marketing Cloud Admin goes deeper into the administrative side of the platform, with broader control over settings and configurations.
Assign the appropriate permission set to each team member based on their role. But don’t stop here, because permission sets alone are not enough.
Making the App Visible
Marketing Cloud Next is an app inside Salesforce. To access it, users search for “Marketing” in the app launcher. But if their user profile hasn’t been added to the app, they won’t be able to see it at all.
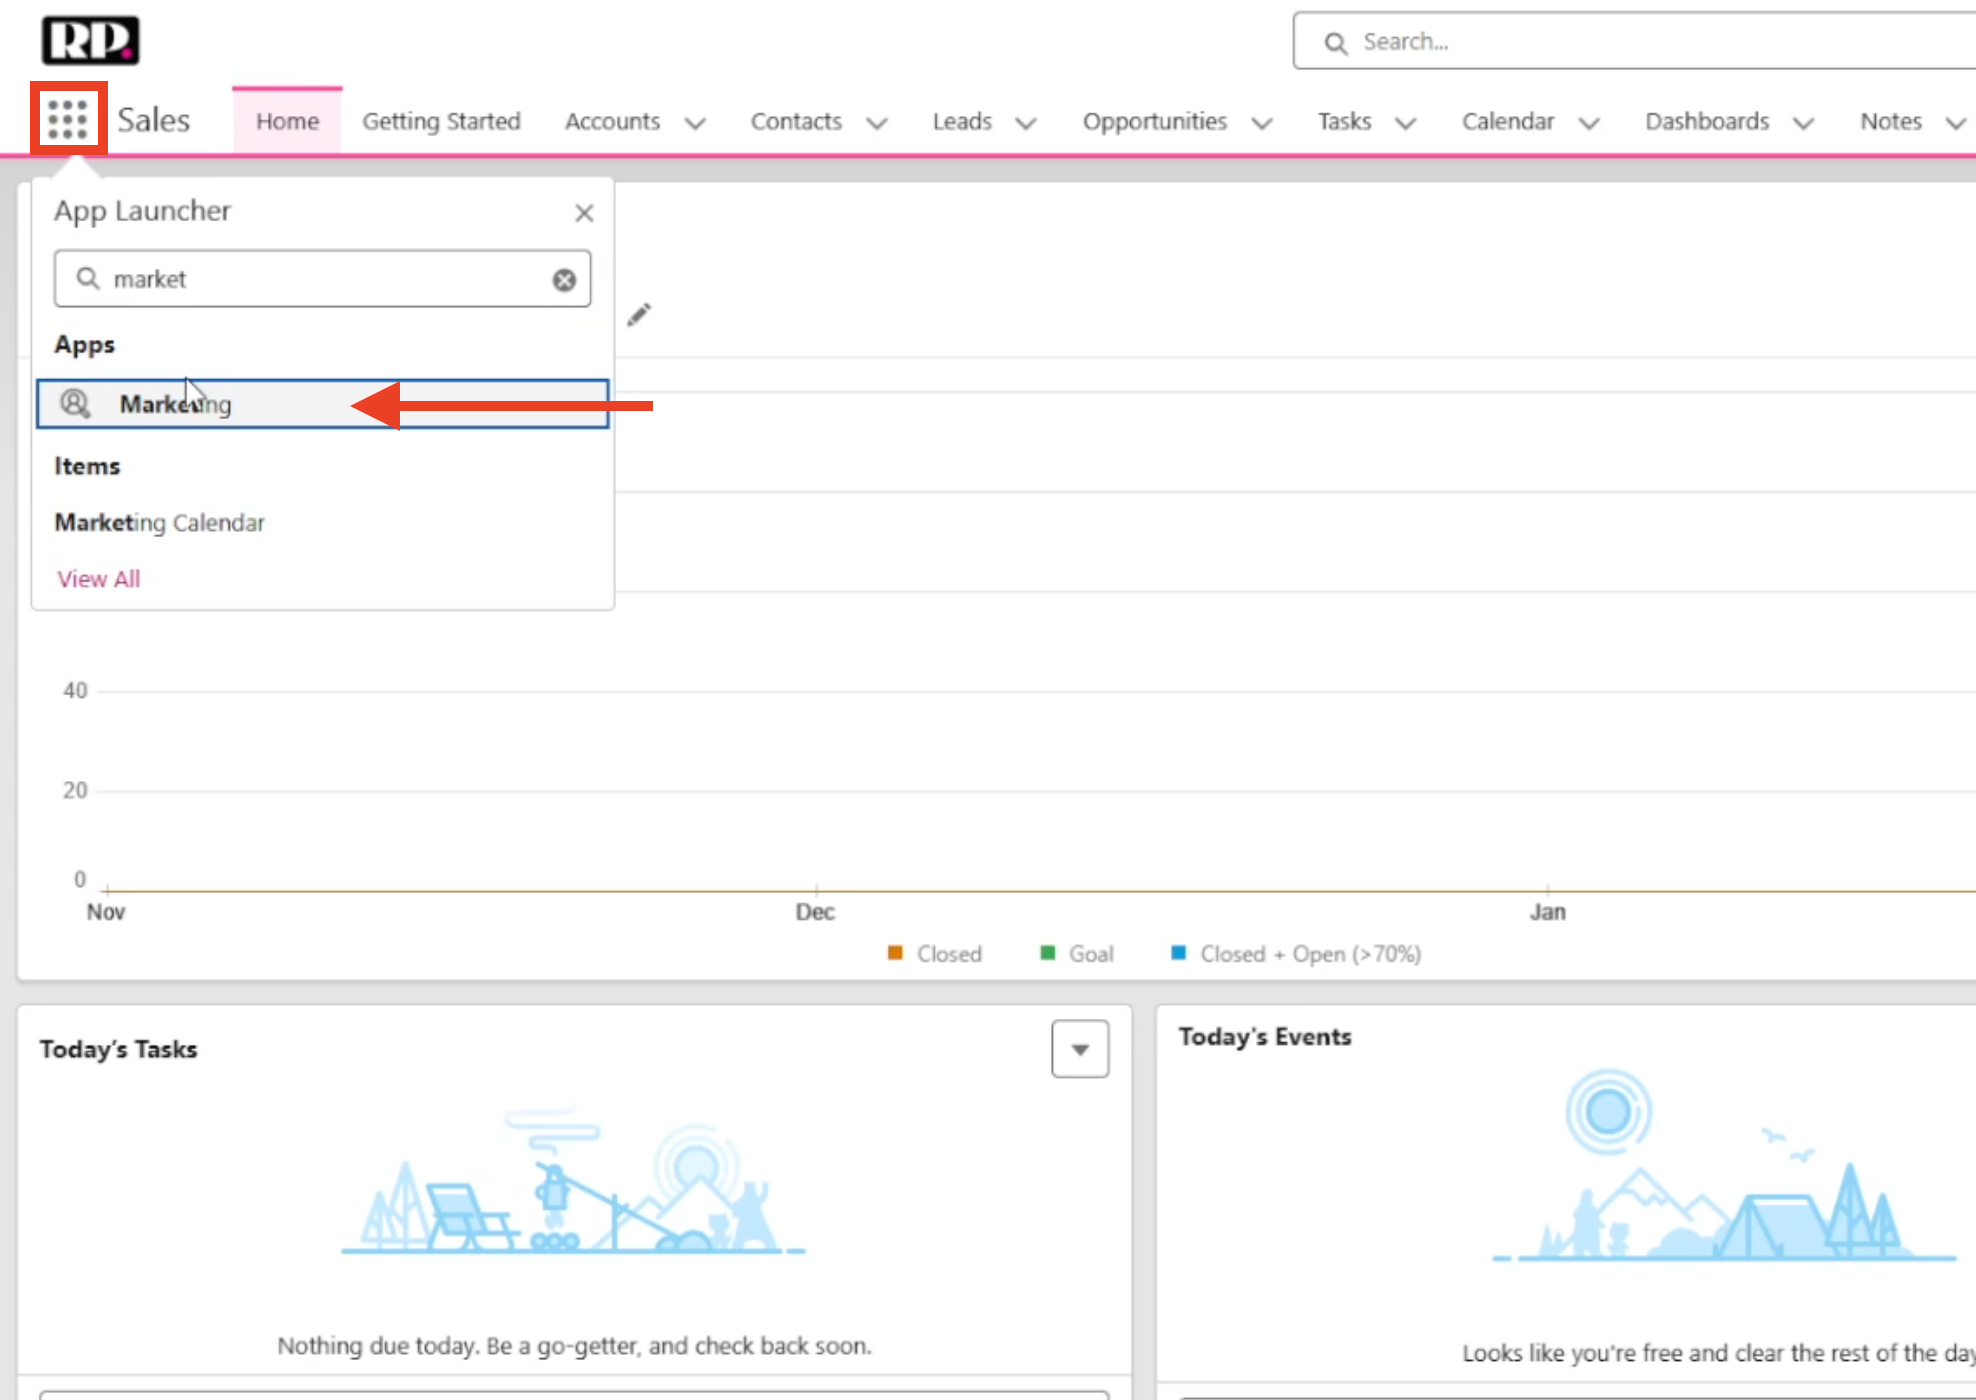
This is exactly what happened during our own migration. We assigned the Marketing Cloud Admin permission set to a team member, but when they tried to log in, they just got a red banner saying they didn’t have access. They refreshed the page, logged out and back in, and even waited a few days. Nothing helped.
The issue was that their user profile hadn’t been added to the Marketing Cloud app. Only the System Admin profile is included by default. Here’s how to fix it:
[GIF: Adding profiles that need access to Marketing Cloud Next]
This is a step that many people miss because it feels counterintuitive. You already gave someone a permission set, so why would they also need profile-level access to the app? But Salesforce works with multiple layers of security like this.
CMS Workspace Access
Even after your team has permission sets and app access, they may still not be able to see the Content Management System. This is yet another access layer.
To grant CMS access:
Other roles — can create content but not publish it.
[The Contributors panel within a CMS workspace, showing the role assignment options]
Be sure to set all of this up when you’re first provisioning your team. Otherwise, you’ll get a lot of messages from colleagues telling you they can’t see anything.
Our First Email: A Cautionary Tale
Once our team had access to MCN and the audience was mostly migrated, we were asked if we could send our monthly newsletter from Marketing Cloud Next. We said yes. How hard could it be?
We set up DMARC and DKIM for Marketing Cloud Next, which also meant removing DMARC and DKIM from Pardot. So suddenly, we couldn’t send emails from Pardot anymore. But we also couldn’t send from MCN yet, because we hadn’t set up consent, segmentation, or basically anything else. We had access, and that was it.
To make things worse, we were at a conference that week, and the newsletter was supposed to go out in a few days!
The big takeaway here is that having access to MCN is not the same as being ready to send.
You still need to configure consent, segmentation, email authentication, and more before your first email can go out. Don’t commit to a send date until those things are in place. And definitely don’t disable your existing platform’s email authentication before the new one is fully operational.
In the end, we made it work, but it was a product of some very creative problem-solving under pressure!
What’s Coming Next
In the next episode of our guide (and the final instalment in Part 1), we’ll cover identity resolution in depth, how to properly send your first email, and much more. Stay tuned!
P.S. If you are feeling confused or overwhelmed when navigating through any of the steps in this article, feel free to reference the video above for an in-depth walkthrough.
This website uses cookies to improve your experience. We'll assume you're ok with this, but you can opt-out if you wish. Read More